
Last week I talked about different elements that contribute to the shape of a neck. I’m going to build off of that so I recommend checking it out if you haven’t read it already. I going to continue to babble for a little bit longer about how neck shapes (specifically movement this week) because my customizing technique requires me to have a solid understanding of the mechanics.
I’ve already established what makes various necks different, but now I’d like to talk about what makes them the same. Every neck from Arabs to drafts work in a predictable way. They starts in the neutral position:
The Neutral Position
Like I said last week, the height of a horse’s neutral position varies wildly from breed to breed.

A Tennessee Walking Horse in neutral

A stock-ish Morgan-y thing in neutral
If you’re judging a horse in halter, it’s ideal to see him in neutral position. Ewe, swan, and knife necks (and other conformational flaws) are most obvious in this position. The muscles of the neck relax and flatten out. When viewed from the top, the neck is thinnest in this position.

Raising the Head

The higher a horse raises its head, the more obvious the S-curve of the cervical vertebrae (neck bones) becomes. It will increase the “swan neck” effect. All the squishy parts then bunch up around the vertebrae. The throat appears to press up into the neck as the muscles on either side bulge.

I couldn’t find a photo to demonstrate my point, so here is another photo of an attractive actor.
Above the withers at the base of the neck, the squishy parts form a convex curve. The thin skin in this area wrinkles like a Shar Pei.


Because the base of the cervical vertebrae attach so close to the chest, this means the horse is sorta folding his spine closer to his withers in this position. The bottom of the S-curve moves closer to being parallel with the angle of the shoulder blade.
Clear as mud? Then ignore the above paragraph and just remember raising the head makes the neck look shorter.
Lowering the Head
Lowering the neck works the opposite way as raising it. It flattens out the S-curve, straightens the overall shape, and appears to lengthen the neck.
Think of the horse’s cervical vertebrae as a snake. A stretched out snake will appear longer than when he’s bunched up. However, the snake never changes his actual length.
In the lowered position, if a horse has a crest, it’s beautiful cresty glory will still be visible in this position even if though the rest of the neck appears straight.

This blog has finally devolved into "look at how pretty my poneh is!"
On the Bit
The most common complaint I hear about Breyers (after “fish scale dapples” and “why aren’t breyers as cheap as they were when I was 8?”) is about such-and-such new mold not being on the bit. If you want to sell lots and lots of custom model horses, buy up a bunch of Roxys, Giselles, and Weather Girls and customize them so they are on the bit. You can pretty much just paint them in black primer at that point and you will still have performance showers clamoring for them.
On the bit can mean different things for different disciplines and breeds, but in an extremely general (practically meaningless) sense, it’s an arched neck with the nose tipped in. The implication on a model is that the horse is willing and responsive under saddle.

Relaxed and on the bit.
I say impied because being in the right pose doesn’t always mean willing and responsive. This shot was taken 3 minutes after the little snot tried to buck off her rider in a pleasure class. Note the tensed muscles in her neck below versus the flat relaxed muscles above.

4-H horse, my ass.
Various Techniques
I’m finally ready to start customizing my model. When I’m ready to start redoing a model’s neck, I already have decided if he’s going to be a performance horse, what pose I want the neck to be in, and what gender and breed my model will end up. I’ve already spent a few quality minutes surfing through Google Images for reference photos and I’ve found an exact match for my project.
Over the years I have changed my technique for this process considerably. I started by heating and bending the neck. Then I moved to cutting slits. Then I cut off all of the neck except the throat and then I’d heat that...and so on. I know there are a lot of artists out there that use these various techniques successfully and I say more power to them. However--if you’re just starting out or your current technique isn’t working--a lot of these techniques have quirky tendencies that can set you up for failure.
My current approach is very sink or swim. I mean that in the sense I am dropping you all in the deep end of the pool and assuming you were listening intently when I demonstrated the backstroke while standing on dry land.

Dive in!
I would love to tell you I can show you where to make two quick cuts or place a heat gun on Roxy’s neck for 30 seconds to put her correctly on the bit. If you are changing the neck on a Roxy (or Giselle, etc.) and it does not take a lot of time and a bunch of resculpting, it’s very likely that you’re not doing correctly.
Using my technique, you have to produce a new neck virtually from scratch, but taking off the training wheels will help you to learn to be a better sculptor--faster.
Off With His Head
I like to call my technique the “Guillotine Approach.”
First, I plan my cuts. I use a Sharpie--red in this case as I keep losing my silver one--and outline where the flat portion of the neck meets the front most muscling of the shoulder.
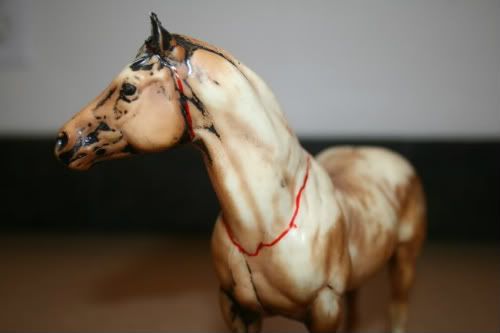
Then I do the same for the top of the neck, this time behind the cheek, under the jaw, and around the poll.
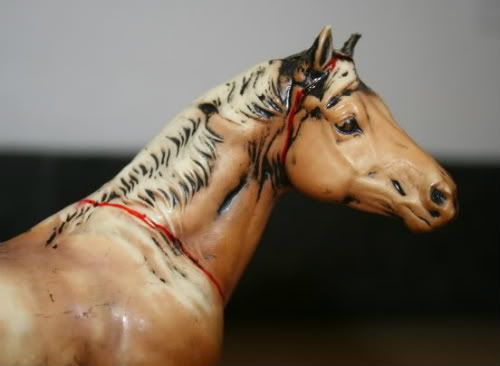
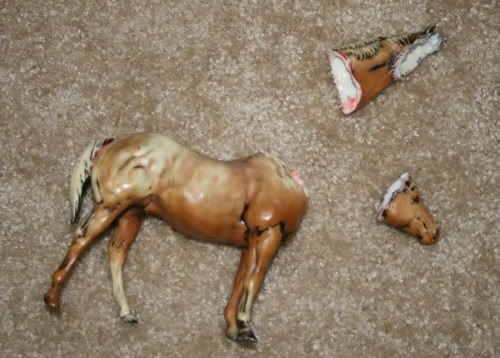
And then the fun part:

It’s not essential, but I try to remember to remove the head from the neck before I separate the neck from the body. It’s just easier. As I’ve done in the past, I grind the edges of the my new cuts smooth to make the later application of clay easier.
Off With His Head
I like to call my technique the “Guillotine Approach.”

First, I plan my cuts. I use a Sharpie--red in this case as I keep losing my silver one--and outline where the flat portion of the neck meets the front most muscling of the shoulder.

Then I do the same for the top of the neck, this time behind the cheek, under the jaw, and around the poll.

And then the fun part:
It’s not essential, but I try to remember to remove the head from the neck before I separate the neck from the body. It’s just easier. As I’ve done in the past, I grind the edges of the my new cuts smooth to make the later application of clay easier.

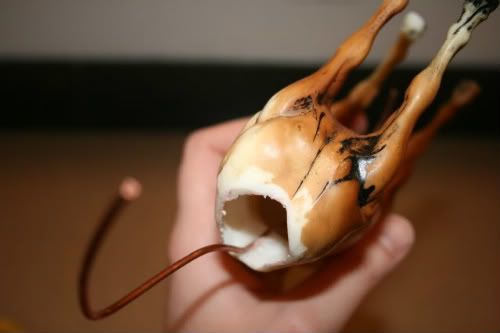
Next, I pick up the now fully removed neck and I throw it out. Yup, pitch it. I won't need it.
I reconnect the head to the body with armature wire (a thick, pliable wire found at art stores). Attaching the wire inside the body is a bit trickier than the applications I've showed you all in the past. Depending on the final position, I can secure it either to the bottom or top of the hole I've made where the neck used to be--whichever keeps the wire most out of my way. I use several layers of super glue and baking soda dripped and dusted inside the body until the wire stays in place.
Now I print out a copy of my reference material so the picture is approximately the same size as the model. I use the photo as a pony-ruler to measure the length of the wire and proper placement of the head.
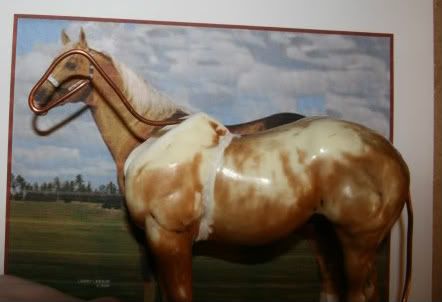
I loop the end of the wire so the loop will fit tightly into the head. Again, I attach with super glue and baking soda.
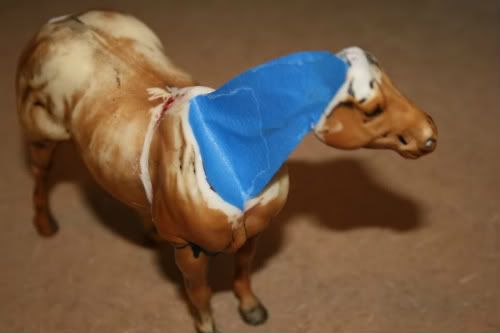
Over the wire, I layer a couple pieces of blue masking tape on both sides, enough to cover the entire gap between the head and body. I use my Sharpie again (I found the black one by this point) and sketch out the profile of the neck.
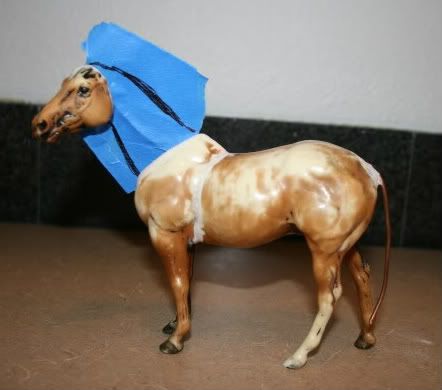
On one side of the neck, I stabilize the tape using a few layers of baking soda/super glue. I wash off the excess baking soda, set the model aside to dry, and wait until next week when I cover the muscling of the neck.


On one side of the neck, I stabilize the tape using a few layers of baking soda/super glue. I wash off the excess baking soda, set the model aside to dry, and wait until next week when I cover the muscling of the neck.


5 comments:
Ummm...I forgot what I was gonna say...I saw that pic of David Boreanaz and blanked out. Oh, yeah! Thank you for posting this. I look forward to the next installment!
*Continues to drool over nekkid actor like Homer Simpson does over a box of doughnuts* Gnuh.....
You really are the most helpful person I know when it comes to costomizing! I've been using a lot of your techniques, recently I used the ears one and my ears turned out beautifully! I fell in love with them! I can't wait for the rest of the necking tutorial because I have a few models I plan on beheading for their next transformation! Thanks so much for making your extremely helpful tutorials! They've really changed the way I work.
Wow, you make it seem so simple! I look at this post and think "why on earth didn't that occur to me? It's obvious now you say that..."! Looking forward to the next post :D
Remember, I failed for years before I tried most of these techniques. ;)
Pretty sure you just made my day with that David Boreanaz picture.
And of course, the awesome tutorial :P.
Post a Comment