Okay...that was weird. For some reason, an HTML tag ate my post from yesterday. Here it is in it's entirety.
I'm getting ready to list a few of models to MH$P in the next few weeks. These will in include resins, OFs, and customs. I'm making a semi-serious attempt to cut down my collection to a more manageable size.
All of the custom and resin work has previously NAN'd (I think most have current cards.) Most of the OFs are from my show string as well and many have NAN'd. Some of them are OF Breed winners and some are collectibility horses.
Monday, December 20, 2010
Thursday, December 16, 2010
Best Laid Plans

Michelangelo liked to talk about how the final piece was already in the marble:
In every block of marble I see a statue as plain as though it stood before me, shaped and perfect in attitude and action. I have only to hew away the rough walls that imprison the lovely apparition to reveal it to the other eyes as mine see it.I work in the opposite direction--I’m generally a builder, not a carver--but the sentiment is the same. As a sculptor, my work mostly lives in my head.
At BreyerWest this year, I got a lot of shocked comments over my jumping pony and Man O War (below, in progress). Both made it through the sculpting, prepping, and painting phase over the course of two weeks, more or less. And I work full time. And I’m training a horse. And I occasionally find the time to sleep.

Well, those two weeks of fury were what the public saw. My reputation for working at a furious pace is--alas--a myth. What you guys didn’t see was the weeks of construction (sawing apart the original plastic bodies and then putting them back together.) Then there were the months of staring them down, not making any visible progress. Then they were shoved out of sight in a box for a few months.
That Man O War? I started him early in 2009. The pony? Almost three years old.
That’s because the second step, the staring bit, is the heart of the progress. I look at a lot of reference photos, but most of the time I just stare at the model. 90% of sculpting for me is mental. I know exactly what I want to do before I jump in. My motto is measure twice, sculpt once.
I guess that’s why I enjoy customs so much. You have *maybe* an hour of working time to get something done, so you need a detailed plan. You can’t (and shouldn’t) wing it on a custom, especially a drastic.
Michaelangelo talked about carving, but as a clay sculptor I build up more than I carve down. I’ve dabbled in carving from time to time, but because I make model horses, I have to build my work instead of whittling it down from a large block. I see the final piece out in space instead in a hunk of marble. I just need to fill in the empty space. Inside the space, I form the armature, build the frame, and apply clay.

Lots of empty space here, but I "see" what I will eventually add.
However, as customizers, we need to learn to work in both directions. I start with more than a block since the original model is (presumably) horse shaped. I carve away what doesn’t fit with my vision of the final product, then I build back what I removed into the empty space.

These bits did not fit my vision for my drastic custom Sham
It’s not particularly exciting to watch me work. I’m slow as snail snot because I spend so much time in my head making edits. I add a little here, remove this bit there…all before I touch my tools. There’s lots of staring. I continue to edit when I build out the frame, usually fixing mistakes I initially made in my head. The frame serves the same purpose as the time I spend in my head as I continue to visualize the model’s surface. The closer I get, the clearer the final product becomes.

What lives in my head.
I devote an enormous amount of time to visualizing because model making is such a objective and technical way to work. To create (or more accurately re-create) a proportional miniature, you need to spend a lot of time analyzing and mentally measuring your work. It’s not abstract art, so you can’t “feel” your way to the final project. Ours is not a touchy-feely profession.
Having said that, while I own a measuring compass, it’s stuffed in a box somewhere in my garage. I’ll use it if I’m really and truly stuck on a problem. I rely on the template I have in my head of what a horse should look like and work to match that. Think of laying one image over another to see where they match and where they differ.
The other side of that coin is I devote significant energy to improving my template. I spend an extended amount of time looking at the real thing (more hours per year then I spend sculpting, by far.) If you want to improve your knowledge of movement and anatomy, find time to spend around live horses. If you don’t own, take lessons, find a friend who does, reach out to local hobbyist who owns, or volunteer at a rescue or therapy center. Invest in a few equine anatomy and breed books and look at every page. Surf the net for images. Look at horses performing different disciplines and familiarize yourself with their varied movement and body types.
Next week I’ll get into the actual nitty-gritty of building a frame.
Thursday, December 9, 2010
Baking Soda and Super Glue: A Love Story
*All of models in this post were created using the super glue and baking technique.
In the past, I have been credited with inventing the baking soda/super glue combination. While I would absolutely love to take credit for something so brilliant on which 90% of my techniques rely, it’s not my own. I believe was introduced to the hobby by Carol Williams. This is her original tutorial.
I’ve come with a few twists and original applications for it, but I am merely an extremely vocal advocate of this powerful combo.
Having said that, this is how I use it.

The very basic idea is if you sprinkle a small amount of baking soda on a liquid super glue, it will cause the glue to harden almost instantly. Baking soda acts as an accelerant on the glue.
Scientifically speaking, super glue is the common name for cyanoacrylate or CA. It is a resin based material. Yes, it is very similar to the resin that your resin ponies are made of. Like that resin, when it dries it’s rigid with a slight amount of bend. It’s not rubber-like flexible, but it is just flexible enough to resist the small amount of stress a model horse will usually encounter when being moved around. Because it is a similar material to resin (and some extents it is also similar to cellulose acetate, which is what Breyers are made of) it plays nicely with the original body. In my experience, this creates a more stable custom overall.

When left to dry on its own, super glue will slowly shrink and lose mass. However, when you add baking soda, the shrinkage is minimal. That means it can be used effectively as a building material and gap filler. In our hobby, the most common material used as a building material and gap filler is some form of epoxy (see Brands I Prefer for more). The advantage of super glue/baking soda has over the malleable epoxy is it’s instant drying ability. Usually, you’ll have to build up a few layers to fill large areas, however this still takes much less time than it takes epoxy to fully cure.


You can use super glue/baking soda to replace missing ear tips. For further reading, here is a tutorial on how this is done. I’ve used it to restore an original finish Breyer whose ear was missing entirely. This required many applications, layered on top of each other, to rebuild a large blob in the general shape of an ear. I went back with my dremel to grind down and refine the shape of the ear.

Super glue/baking soda is my favorite framing material. A frame is transition phase I use between a wire armature and the clay stage of sculpting. For me, this is a crucial stage to building a drastic custom. The frame allows me to better visualize the final product and get a feel for the proportions and silhouette of a custom. Many hobbyists use a chicken wire-like material for this step. I have some of this stuff shoved in a box somewhere, but I tend to accidently stab myself with it. I like my frame to be as precise and non-violent as possible and wire doesn’t cut it.

Tune in over the next two weeks for more about framing: the what, why, and how.

Friday, December 3, 2010
Brands I Prefer: Everything Else
Last week, when I talked about brands I focused on personal preference. At the end of the day, clay is clay and picking Aves over Amazing Sculpt or Gapoxio will not improve your customs by itself. Being forced to use an unfamiliar brand may leave me weeping under my desk in the fetal position, but I could sculpt with it if I had to.
However, sometimes a brand can make all the difference. Some of the techniques I use don’t work (or work well) with alternative products.
Glue
When I’m customizing a model, I generally the same amount of time--or more--constructing a custom with super glue as a I do with clay. My super glue and baking soda techniques deserve their own post, but the technique itself hinges on using the right type of glue.
If your glue has too high of a viscosity, it won’t work well for the baking soda technique. Gorilla Glue is one brand you’ll run into at most hardware stores that has too high or a viscosity for use with baking soda. High viscosity is ineffective because only the top layer will absorb the soda, and you will need to leave it to dry for a while. If you’re reattaching a tail or an ear with thick glue, the excess will spill out when you push the parts back together. This will dry as a lump, making your repair very obvious.
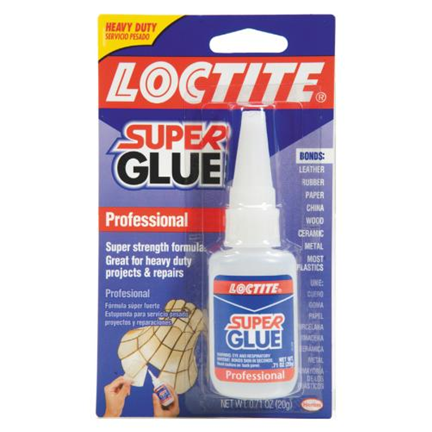
On the other hand, low viscosity is more prone to drip and make a giant mess either on you or your horse. If you’re buying a rated glue, I shoot for something in the medium range. I live closer to Lowes than a hobby store, so I stick with (ha ha) Loctite. Loctite makes half a dozen variation of super glue, but I use the giant bottle. Trust me, you’ll use it all. I buy these four or five at a time.
If you are interested in creating braided manes and tails, you’ll also need a glue-like substance called Fray Check. I use the Dritz version. A fabric store like Joanns or Hancock will carry several different liquid sew/no sew/fray stopping type products. A lot of them are very gooey and similar to tacky glue. The tacky glue products DO NOT work with my braiding technique. Dritz Fray Check works because it has very low viscosity.

Tools
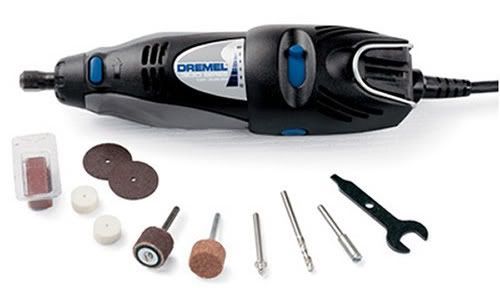
This is my dremel:
I like it, but ultimately it comes down what fits you’re price range and suits your needs. For models, I don’t think you should have to upgrade from this level and you may be comfortable with less power for less money. I tend to shy away from battery powered units because the batteries and chargers, in my experience, wear out before the tool does.
This is my heat gun:
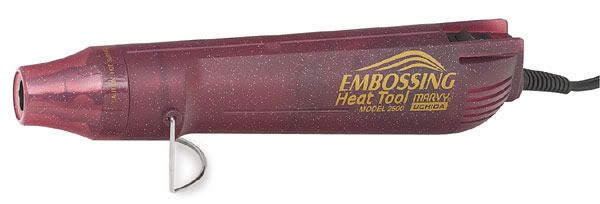
It’s cheap and suits my purposes. I keep losing them in my garage full of crap and buying replacements. I know customizers that use a blow torch. Could be a bit overkill most of y’all.
Don’t bother boiling models. When boiling, you can’t target small areas. A heat gun is absolutely worth the money and the saved heartache when it prevents nice bodies from turning into limp noodles.
This is my sculpting tool:
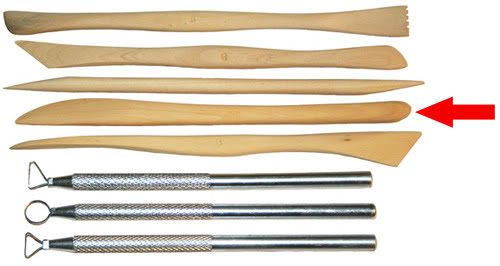
Yup, just the one. I have several copies of this tool, which I bought in packs of various tools from Michaels. I don’t know what’s become of the 5 or 6 other tools that came in the package. I could just throw them out for as often as I use them.
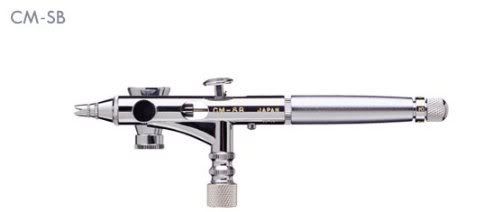
I have an Iwata Eclipse BCS, which I prefer for basecoats on traditional scale models. For details, I use an Iwata Micron (side-feeding version for lefties.) I’ve used a lot of brushes over my career and I’ve traded up several times. However, my two brushes together set me back about ~$600. Unless money is no object, that is a huge investment for a beginner. I started with a $20 badger and an air-can. It sucked, but it helped me determine that this was the medium I preferred. The Badger Crescendo isn’t a bad brush for a painter starting out (if they know they’re committing to this medium) because it comes with multiple tip sizes. I thought switching out a wide tip for a fine one was useful when I was still developing a feel for controlling the paint.
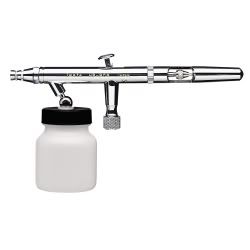 Iwata BCS
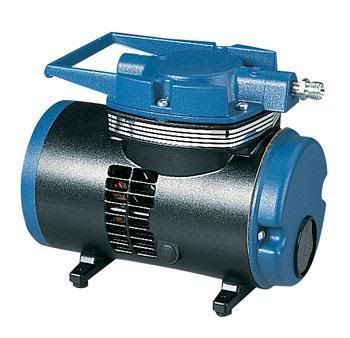
I hate my air compressor but it will not die. I’m looking to upgrade before the end of the year.
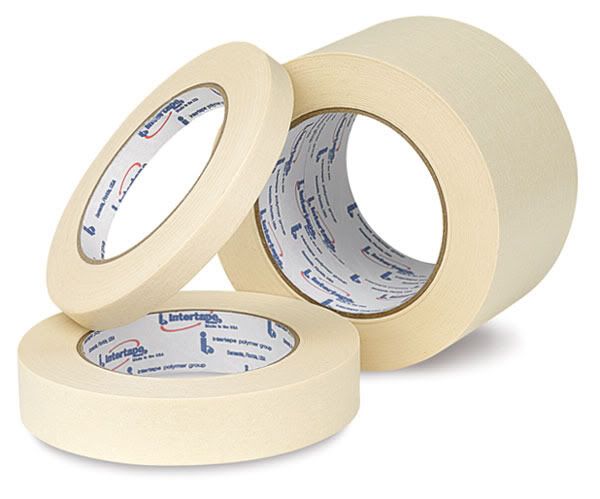
Tape
This section will make a more sense in a few weeks. I promise.
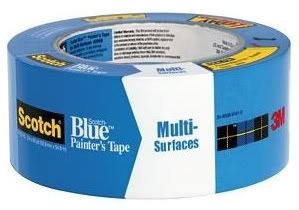
I’m a big believer is Scotch painter’s tape. Wider is better (I use 3”). The masking tape should have a paper-y feel and a small amount of rigidity. I’ve used the pale cream-ish masking tape when I’ve lost my blue roll, but it’s often too floppy for my purposes.
Paint
If you ask a dozen artists what brand of paint they prefer, you’ll get a dozen answers. These are the brands *I* use, but I won’t tell you you’re wrong for preferring a different medium or brand. Continuing to use the same paints, instead of carelessly skipping from brand to brand, is more important than which brand you choose.
Basic colors (e.g. Burnt Umber, Yellow Ochre, etc.) will vary slightly from brand to brand. Burnt Ochre by Liquitex doesn’t look or mix the same as Burnt Ochre by Golden. And in my paint box, the more the merrier.
I think of every color in each brand as having a unique personality. Some have strong personalities and overcome other colors they are mixed with. Some look like one color when used alone, but change their shade when mixed with a neutral color (like white or black.) Some darken when they dry. As a painter, it’s important for you to know the personality quirks of your paints.
Most of my paints are the regular golden acrylics. I buy the tubes, not the tubs. You don’t get the same value per ounce, but the tubs dry out before I can use them. For mixing, tubs mean using a palette knife and keeping it clean. To be honest, I have no idea where I put my palette knife.
I have a handful of Golden’s open acrylics bouncing around my paint box I’ve wanted to try since I bought them...two years ago. However, I do most of my painting under the gun, so to speak. I work better under a deadline, and a slow drying paint runs contrary to my usual methods.
I supplement my collection with Liquidex Heavy Acrylics. Basic colors (e.g. Burnt Umber, Yellow Ochre, etc.) will vary slightly from brand to brand. Burnt Ochre by Liquitex doesn’t look or mix the same as Burnt Ochre by Golden. And in my paint box, the more the merrier.
I try to avoid the cheapey bottle paints in most cases. They work for some people, but not for me. They don’t mix as well as the top shelf stuff because they don’t have as much pigment. Although I will use the occasional non-horse colors straight out of the bottle. Generally, that means bases or molded on halters.
Think of it like liquor: Patron makes a great Margarita, but Montezuma will still get you drunk.
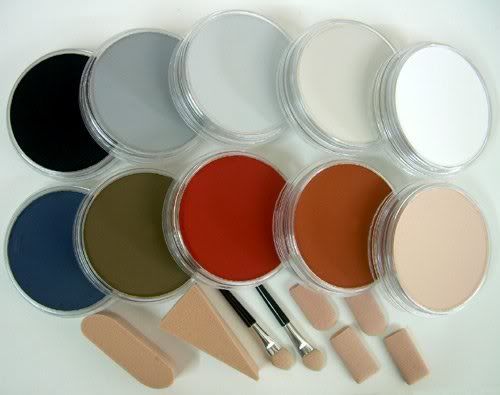
Pastels
I’m not a pastel-first artist, so take this for what it’s worth. I use them for detailing, but not for overall body color. I use Rembrandt when I need a smooth color and Pan Pastels when I just need thick coverage. Even though it can be a pain to add layer upon layer with Rembrandt, it’s worth the extra work on a textured model. Molds like Alborozo that don’t have glass-smooth surface are difficult to pastel because the grainy brands will highlight every nook and cranny (and not in a good way.)
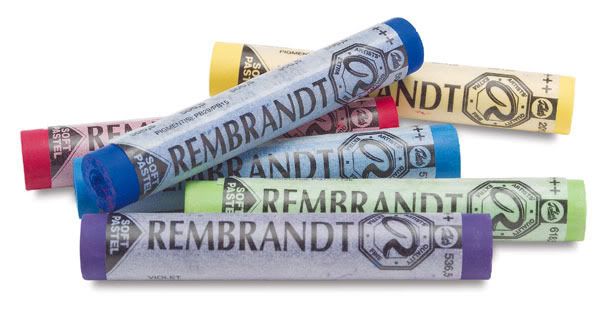
However, Pan pastels are infinitely easier to use. The manufacturer packages them like blush or eye shadow and you should approach them in a similar manner. Stick pastels (like Rembrandt) require you to grind them into a loose powder. It’s messy.
Next week’s episode is “Baking Soda and Super Glue: A Love Story.”
However, sometimes a brand can make all the difference. Some of the techniques I use don’t work (or work well) with alternative products.
Glue
When I’m customizing a model, I generally the same amount of time--or more--constructing a custom with super glue as a I do with clay. My super glue and baking soda techniques deserve their own post, but the technique itself hinges on using the right type of glue.
Viscosity:Think of viscosity as stickiness or gooeyness. Super glue is available is a variety of viscosities. Regular brands you find at Lowes or Home Depot will vary in thickness, but you’ll generally be left to guess at how think or thin they are if you haven’t use a particular brand before. You can also purchase super glue at a hobby shop which is conveniently rated by viscosity.
1. The resistance of a substance to flow. For example, water has a lower viscosity than molasses and flows more easily.
2. The quality or condition of being able to adhere to things.
If your glue has too high of a viscosity, it won’t work well for the baking soda technique. Gorilla Glue is one brand you’ll run into at most hardware stores that has too high or a viscosity for use with baking soda. High viscosity is ineffective because only the top layer will absorb the soda, and you will need to leave it to dry for a while. If you’re reattaching a tail or an ear with thick glue, the excess will spill out when you push the parts back together. This will dry as a lump, making your repair very obvious.
On the other hand, low viscosity is more prone to drip and make a giant mess either on you or your horse. If you’re buying a rated glue, I shoot for something in the medium range. I live closer to Lowes than a hobby store, so I stick with (ha ha) Loctite. Loctite makes half a dozen variation of super glue, but I use the giant bottle. Trust me, you’ll use it all. I buy these four or five at a time.
If you are interested in creating braided manes and tails, you’ll also need a glue-like substance called Fray Check. I use the Dritz version. A fabric store like Joanns or Hancock will carry several different liquid sew/no sew/fray stopping type products. A lot of them are very gooey and similar to tacky glue. The tacky glue products DO NOT work with my braiding technique. Dritz Fray Check works because it has very low viscosity.
Tools
This is my dremel:
I like it, but ultimately it comes down what fits you’re price range and suits your needs. For models, I don’t think you should have to upgrade from this level and you may be comfortable with less power for less money. I tend to shy away from battery powered units because the batteries and chargers, in my experience, wear out before the tool does.
This is my heat gun:
It’s cheap and suits my purposes. I keep losing them in my garage full of crap and buying replacements. I know customizers that use a blow torch. Could be a bit overkill most of y’all.
Don’t bother boiling models. When boiling, you can’t target small areas. A heat gun is absolutely worth the money and the saved heartache when it prevents nice bodies from turning into limp noodles.
This is my sculpting tool:
Yup, just the one. I have several copies of this tool, which I bought in packs of various tools from Michaels. I don’t know what’s become of the 5 or 6 other tools that came in the package. I could just throw them out for as often as I use them.
I have an Iwata Eclipse BCS, which I prefer for basecoats on traditional scale models. For details, I use an Iwata Micron (side-feeding version for lefties.) I’ve used a lot of brushes over my career and I’ve traded up several times. However, my two brushes together set me back about ~$600. Unless money is no object, that is a huge investment for a beginner. I started with a $20 badger and an air-can. It sucked, but it helped me determine that this was the medium I preferred. The Badger Crescendo isn’t a bad brush for a painter starting out (if they know they’re committing to this medium) because it comes with multiple tip sizes. I thought switching out a wide tip for a fine one was useful when I was still developing a feel for controlling the paint.
Iwata Side-Feed Micron
I hate my air compressor but it will not die. I’m looking to upgrade before the end of the year.
Die already.
Tape
This section will make a more sense in a few weeks. I promise.
I’m a big believer is Scotch painter’s tape. Wider is better (I use 3”). The masking tape should have a paper-y feel and a small amount of rigidity. I’ve used the pale cream-ish masking tape when I’ve lost my blue roll, but it’s often too floppy for my purposes.
Paint
If you ask a dozen artists what brand of paint they prefer, you’ll get a dozen answers. These are the brands *I* use, but I won’t tell you you’re wrong for preferring a different medium or brand. Continuing to use the same paints, instead of carelessly skipping from brand to brand, is more important than which brand you choose.
Basic colors (e.g. Burnt Umber, Yellow Ochre, etc.) will vary slightly from brand to brand. Burnt Ochre by Liquitex doesn’t look or mix the same as Burnt Ochre by Golden. And in my paint box, the more the merrier.
I think of every color in each brand as having a unique personality. Some have strong personalities and overcome other colors they are mixed with. Some look like one color when used alone, but change their shade when mixed with a neutral color (like white or black.) Some darken when they dry. As a painter, it’s important for you to know the personality quirks of your paints.
Most of my paints are the regular golden acrylics. I buy the tubes, not the tubs. You don’t get the same value per ounce, but the tubs dry out before I can use them. For mixing, tubs mean using a palette knife and keeping it clean. To be honest, I have no idea where I put my palette knife.
I have a handful of Golden’s open acrylics bouncing around my paint box I’ve wanted to try since I bought them...two years ago. However, I do most of my painting under the gun, so to speak. I work better under a deadline, and a slow drying paint runs contrary to my usual methods.
I supplement my collection with Liquidex Heavy Acrylics. Basic colors (e.g. Burnt Umber, Yellow Ochre, etc.) will vary slightly from brand to brand. Burnt Ochre by Liquitex doesn’t look or mix the same as Burnt Ochre by Golden. And in my paint box, the more the merrier.
I try to avoid the cheapey bottle paints in most cases. They work for some people, but not for me. They don’t mix as well as the top shelf stuff because they don’t have as much pigment. Although I will use the occasional non-horse colors straight out of the bottle. Generally, that means bases or molded on halters.
Think of it like liquor: Patron makes a great Margarita, but Montezuma will still get you drunk.
Pastels
I’m not a pastel-first artist, so take this for what it’s worth. I use them for detailing, but not for overall body color. I use Rembrandt when I need a smooth color and Pan Pastels when I just need thick coverage. Even though it can be a pain to add layer upon layer with Rembrandt, it’s worth the extra work on a textured model. Molds like Alborozo that don’t have glass-smooth surface are difficult to pastel because the grainy brands will highlight every nook and cranny (and not in a good way.)
However, Pan pastels are infinitely easier to use. The manufacturer packages them like blush or eye shadow and you should approach them in a similar manner. Stick pastels (like Rembrandt) require you to grind them into a loose powder. It’s messy.
Next week’s episode is “Baking Soda and Super Glue: A Love Story.”
Thursday, November 25, 2010
Brands I Prefer: Clay
For most sculptors, clay is an intensely personal and riveting topic. Or it is for me. Switching mediums is as dramatic a change as moving to different country. When trying out a new clay, it usually feels “wrong” because it doesn’t respond the way I’m used to.
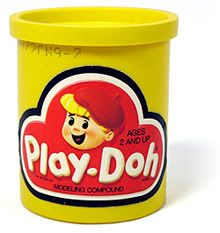
I started working in polymer clay--wait, that’s not entirely true. The very first sculpture I submitted for judging was made from my preferred medium at the time: Play-Doh. It was a horse (shocking!)
I moved to polymer clays such as Fimo and Sculpey at a relatively young age (somewhere around 8 to 10) and stuck with it until I was 18. My high school art teacher pushed me to learn to use firing clay (meh.)
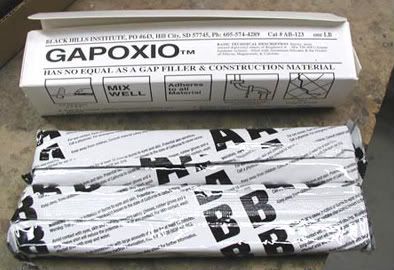
I moved into customizing when I was 13 and started experimenting with various putty epoxies* until settling on Gapoxio, the most popular hobby clay at the time. It got the job done and allowed me to work in greater detail.
*Epoxy is pronounced eh-POX-ee. I do know this, but if you’ve spoken with me about it you’ll notice I pronounce it EE-pox-ee (like E-mail, E-vite, etc.) to avoid confusion with apoxie. I am not dumb. Really.
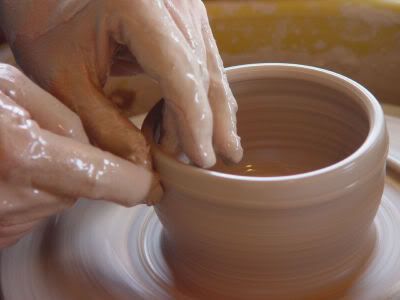
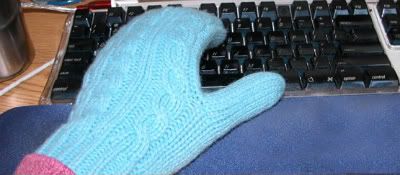
However, the cons of Gapoxio are substantial. It’s mildly toxic and you really should only handle it with gloves. I tend to use the shape of fingers as often to sculpt as I do tools, so working in gloves is the equivalent of typing in mittens.
I started working in polymer clay--wait, that’s not entirely true. The very first sculpture I submitted for judging was made from my preferred medium at the time: Play-Doh. It was a horse (shocking!)
Still meh.
I moved into customizing when I was 13 and started experimenting with various putty epoxies* until settling on Gapoxio, the most popular hobby clay at the time. It got the job done and allowed me to work in greater detail.
*Epoxy is pronounced eh-POX-ee. I do know this, but if you’ve spoken with me about it you’ll notice I pronounce it EE-pox-ee (like E-mail, E-vite, etc.) to avoid confusion with apoxie. I am not dumb. Really.
However, the cons of Gapoxio are substantial. It’s mildly toxic and you really should only handle it with gloves. I tend to use the shape of fingers as often to sculpt as I do tools, so working in gloves is the equivalent of typing in mittens.

It’s durable, strong, and rigid, which is a two edge sword. Thin protrusions like wisps of mane and delicate ears are less likely to break if made with Gapoxio BUT it’s a massive pain in the butt to sand. If you’re not covering an entire body in clay, you’ll have a rough time trying to create a seamless transition to the original plastic. Long term, I suspect it is more prone to separating from the body, leading those vintage customs that so often need repair. However, I’m basing my conclusion on 90% hope. I don’t use Gapoxio anymore so I really, really want this to be true.
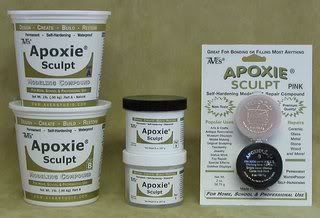
Moving on to what I use now: Aves Apoxie Sculpt.
I find Gapoxio and Apoxie tactilely very similar, so the transition was rather seamless. They both smooth out with water.**
**Aves sells a solvent you’re supposed to use instead and I’ve had rubbing alcohol recommended to me as the best product for this purpose. However, I don’t like the smell of rubbing alcohol and inhaling it isn’t healthy. I’m sure Aves’ solvent is effective but I’m extremely cheap. Rubbing alcohol and solvent do not come free through my kitchen tap.
I switched to Apoxie because it’s easy to sand. It’s a bit softer and a tiny bit more flexible than Gapoxio. And bonus: it’s non-toxic. You could eat the stuff--not recommending it, but it’s safe around pets and children. Aves advertises it as non-flammable, so it won’t spontaneously combust. Which I guess is a plus.
Apoxie remains workable for longer (2 to 3 hours instead of 1 hour for Gapoxio), helpful if you want to work on a larger area or don’t like to feel rushed.
I buy my Apoxie direct from Aves, which you can find here.
The hobby recently gained a new product--Amazing Sculpt--designed to compete with Apoxie. Hobbyist Debbie Lermond developed it with models horses in mind. Being my normal stubborn self, I have little compulsion to change. However, I got the chance to try it a few weeks ago when I didn’t have my usually Apoxie on hand.
I hate this clay with the fire of a thousand suns.
You can’t smooth it with water. You have to use their smooth agent and 16 oz will set you back $17.95 (plus shipping). That’s--what--roughly the size of a bottle of beer? And over a buck an ounce. 16oz of rubbing alcohol is only a buck for the whole bottle.
This is a deal breaker by itself, but my hate goes deeper. After the initial mix, I would describe the texture “mooshy.” More paste-like than clay, it reminds me of half dried tacky glue. The website doesn’t come out and say this directly, but it’s probably toxic. They highly recommend rubber or liquid gloves.
If this clay works for you, don’t let me ruin your enjoyment. However, I would discourage my fellow Apoxie enthusiasts from switching to this product.
Thursday, November 18, 2010
Alborozo #2
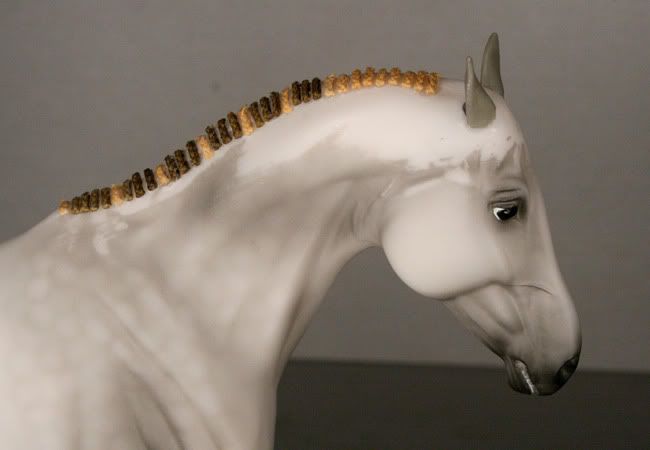
Bonus content for this evening. He is another quirky variation of my basic dapple technique.


Basic Equine Anatomy
This is the beginning of a series of tutorial articles. It’s taken me a while to complete them as I wrote them in the order that happened to interest me at the time instead of an order that would make sense. I started with a lengthy article about the mechanics of the lower leg, but had to work backwards to explain safety, basic tools and their use, and now anatomy.
When talking about anatomy, I try to be as specific as possible. This tends to lead to lot of a technical terms, some commonly known and some not-so-common. And a few not-so-technical. I’m fond of the word “feetsies” instead of hooves. It embarrasses my farrier.
The following illustration includes both. You may want to refer back to this for future tutorials.
(click to embiggin)
Programming Notes
Fear not readers! My recent silence on this blog does not mean I have not been hard at work. Over the last few months, I've finished the next few months of material to appear on this blog.
Better yet, I'm making two substantial new additions to my blogging process. One, I've created a Facebook page. If you don't use RSS, this is a great way to know when I add new material.
Second, new tutorials will begin appearing here on a weekly basis. New tutorials will post Thursday nights because, statistically speaking, the goofing-around-on-the-internet to work ratio goes up substantially on Fridays. Or not. I don't know because 100 people in my office can see my computer screen at all times. It is awkward.
My first official tutorial will post later this evening.
Obligatory plastic pony photo:
Friday, August 27, 2010
Desert Fish, Part Deux
(Part Two)
Some of these may be for sale and some are sold. To be honest, I would have to check with Lauren about who is and is not available.
Swaps won the stock horse class at this year's Breyerfest:


Some of these may be for sale and some are sold. To be honest, I would have to check with Lauren about who is and is not available.
Swaps won the stock horse class at this year's Breyerfest:
Wednesday, August 25, 2010
Desert Fish
These are some of the initial results of project "Desert Fish," which is the combine efforts of myself and Lauren Hoeffer. I do most of the sculpting and Lauren does most of the painting.
A website for all of this is on my ever growing to-do list.
(Click to embiggen)


A website for all of this is on my ever growing to-do list.
(Click to embiggen)
Tuesday, August 17, 2010
WIP : Rabicano
First off, apologies for the repetitive post and the subsequent deletion. The same content was included below, and I forgot to delete the scheduled post with the same horses. I am dumb.
To make up for it, this is what is currently on my work bench. He's a dark brown/sunburnt black rabicano Valor:
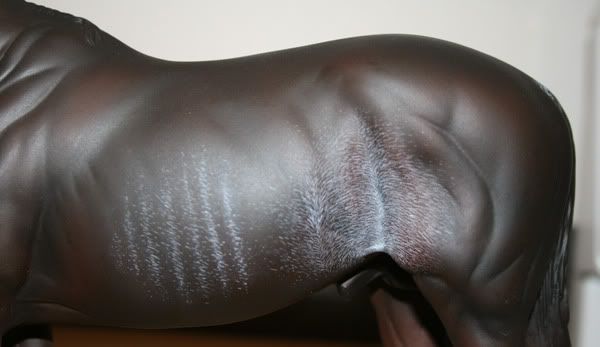
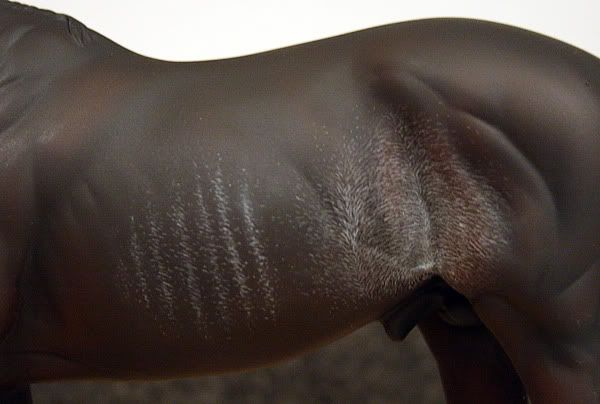
To make up for it, this is what is currently on my work bench. He's a dark brown/sunburnt black rabicano Valor:


Tuesday, August 10, 2010
WIP: Post-Breyerfest Etcetera
I have big (as in drastic) plans for Giselle as soon as they release her as a regular run. I haven't been this enamored with a model (from a customizing standpoint) since Alborozo.
I'm starting simple and working my way up from there:
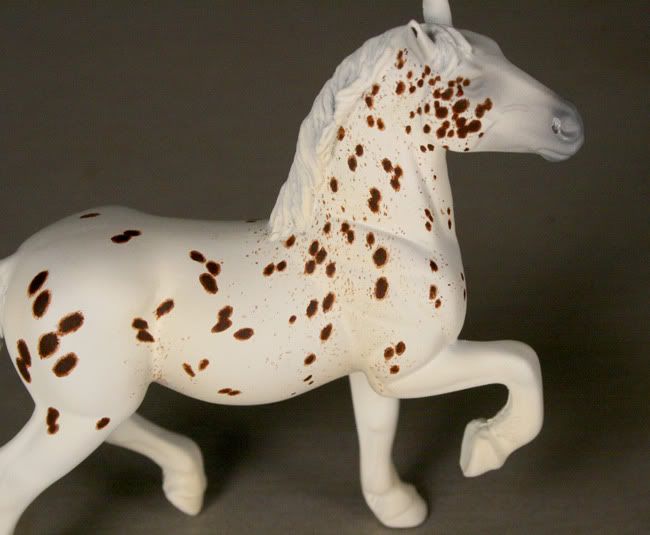
Update on Doodlebug. I'm thinking he'll be a blanket appaloosa and will be a sales piece.
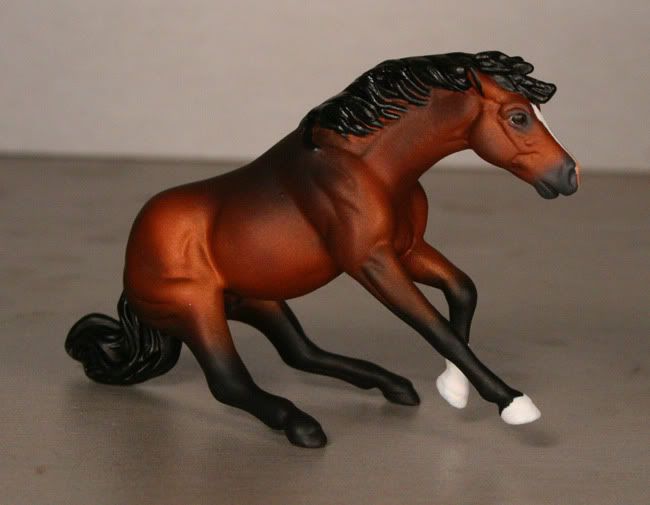
The below models are color tests.
When I airbrush, I like to paint each layer on a test body first (usually a mini) before I apply it to the model I'm really focused on. That way, if something doesn't work I can adjust it before I start applying paint to a drastic custom or expensive resin. If things go horribly, horribly wrong they get tossed into a bleach bucket. I haven't sold any of these before because I usually don't take the time to finish them. However, I'm trying to make time to get these guys the details I think they deserve. They'll be listed to MH$Ps upon completion for under $50.
The bay was for Jessie's Girl. I painted King of the Wing in the same batch, but skipped the red layer and didn't add dark burnt umber and black to the body. Virtually the same mix, but two drastically different bays.
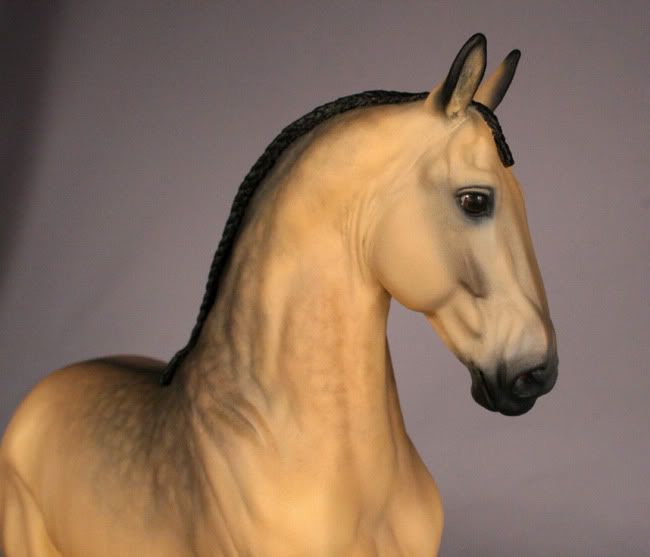
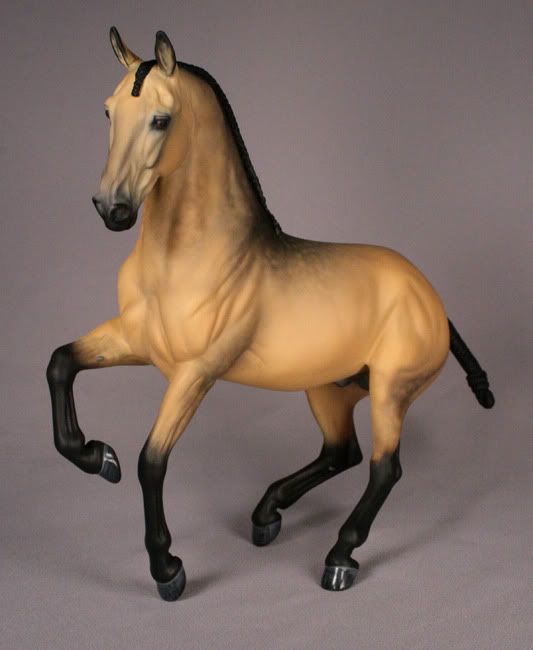
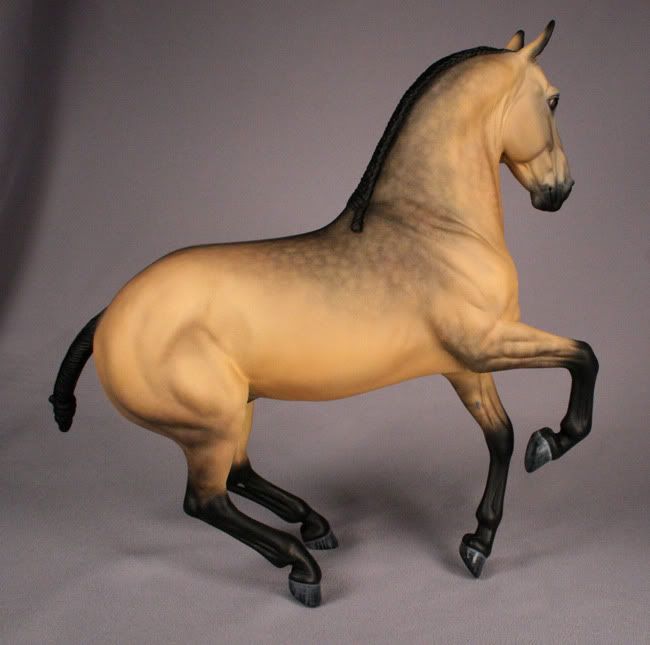
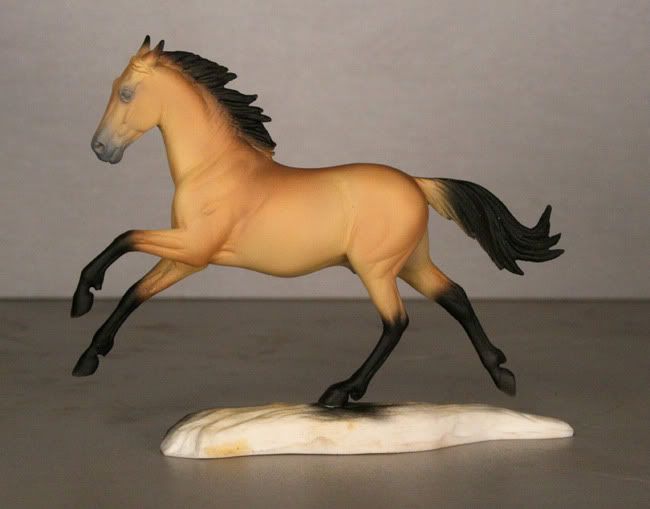
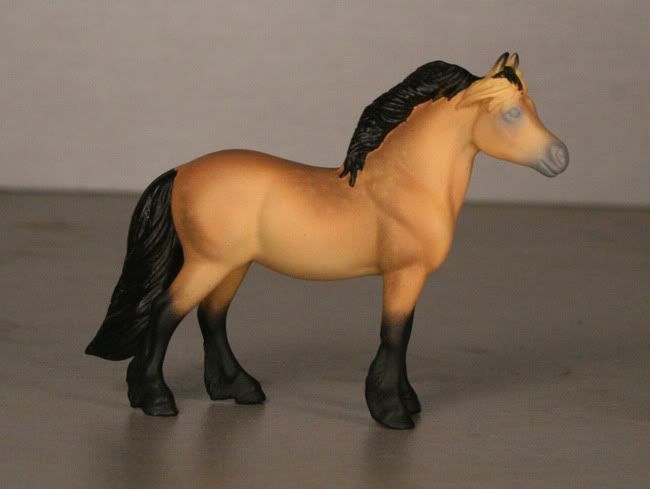
The buckskin was for the braided Alborozo I posted a few months ago.
This is a test of a new technique. I'm rather charmed by her so far and haven't decided her eventual fate or how to apply the technique in the future.
I'm starting simple and working my way up from there:

Update on Doodlebug. I'm thinking he'll be a blanket appaloosa and will be a sales piece.

The below models are color tests.
When I airbrush, I like to paint each layer on a test body first (usually a mini) before I apply it to the model I'm really focused on. That way, if something doesn't work I can adjust it before I start applying paint to a drastic custom or expensive resin. If things go horribly, horribly wrong they get tossed into a bleach bucket. I haven't sold any of these before because I usually don't take the time to finish them. However, I'm trying to make time to get these guys the details I think they deserve. They'll be listed to MH$Ps upon completion for under $50.
The bay was for Jessie's Girl. I painted King of the Wing in the same batch, but skipped the red layer and didn't add dark burnt umber and black to the body. Virtually the same mix, but two drastically different bays.

The buckskin was for the braided Alborozo I posted a few months ago.

This is a test of a new technique. I'm rather charmed by her so far and haven't decided her eventual fate or how to apply the technique in the future.

Subscribe to:
Posts (Atom)


