Ingredients
2 oz Apoxie Sculpt
12 inches of wire
1 model horse (tail removed)
1 bottle of super glue
2 tablespoons of baking soda
1 sharpie marker
1 paint brush (used)
2 oz of water or rubbing alcohol
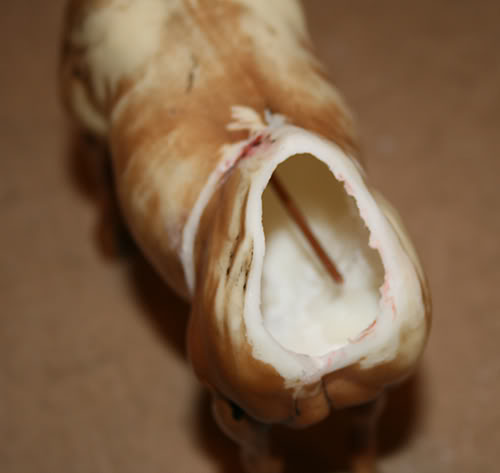
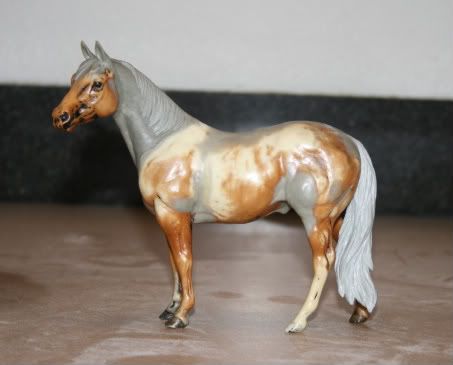
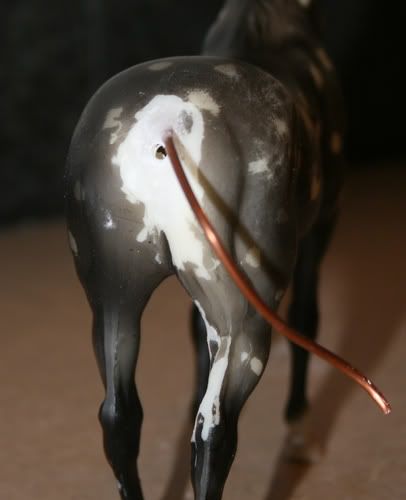
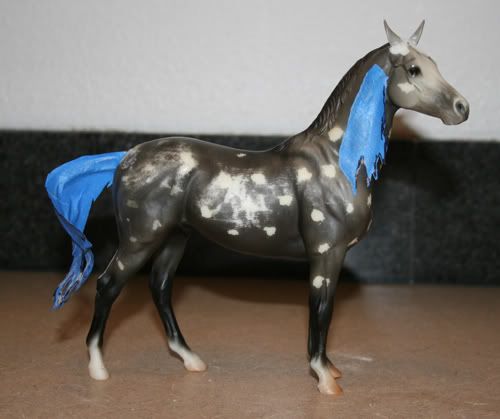
By now, your horse’s butt should look something like this:
Okay, I faked this photo. But you get the idea, right?
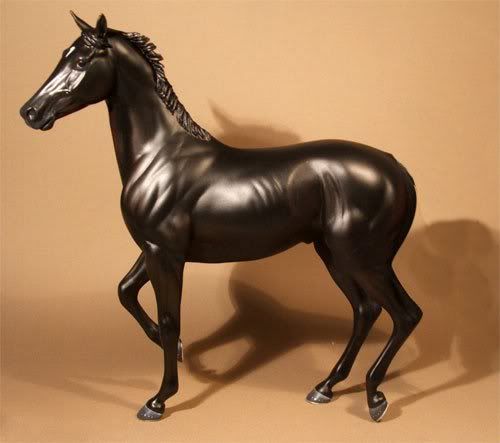
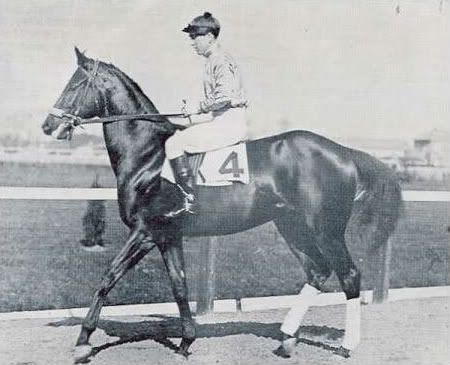
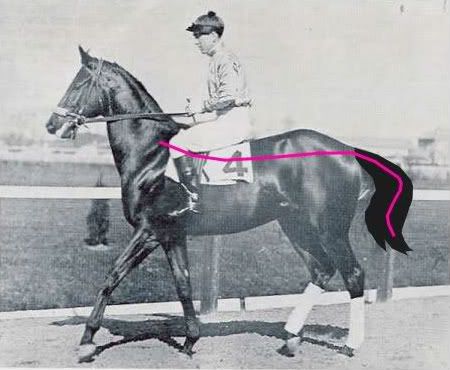
And you have an idea of what you’d like your tail to look like:

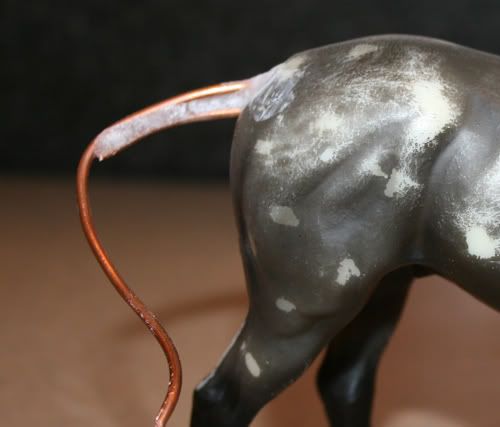
The first step is to add a wire armature for your tail. Either in your head or on your reference photo, draw a line where you expect your wire will best fit.
I feed the wire into the body at least six inches, or 3/4 of the torso length.
Head removal is not required for this step.
At the same time, I start to bend the wire by hand into the general shape I need.
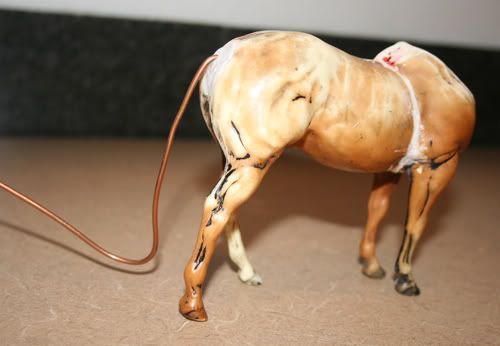
Cut off the excess wire and continue to refine the shape. At this point, I start bending the wire with a pair of pliers.
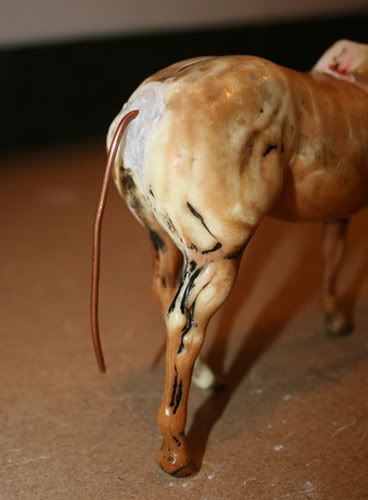
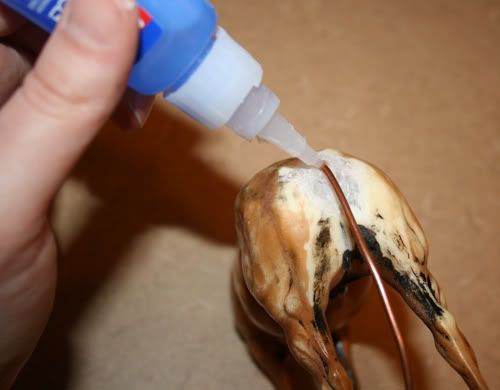
Happy with your shape? Me too. Now I’ll tack the wire in place with a small drop of super glue. You can set the glue instantly with a sprinkle of baking soda. I’ll do this a couple more times to secure the wire in place.
At this point, I take a moment to think about how fragile my tail may be. Does it attach to the body anywhere but the base? Does it swish to the side? Flip over the back?
Remember how hard it was to remove an attached plastic tail opposed to a detached one: the same principle applies here.
Cut off the excess wire and continue to refine the shape. At this point, I start bending the wire with a pair of pliers.
Happy with your shape? Me too. Now I’ll tack the wire in place with a small drop of super glue. You can set the glue instantly with a sprinkle of baking soda. I’ll do this a couple more times to secure the wire in place.
At this point, I take a moment to think about how fragile my tail may be. Does it attach to the body anywhere but the base? Does it swish to the side? Flip over the back?
Remember how hard it was to remove an attached plastic tail opposed to a detached one: the same principle applies here.
Secure.
Not secure.
I particularly like to sculpt swishy tails, but it worries me that they’re more fragile than your standard issue. Currently, I’m experimenting with a method I’m calling “double pinning.”
To double pin, I first add a second hole below my first wire.
I cut a smaller piece of wire, somewhere in the neighborhood of 2 to 3 inches. Longer is preferable, but not required. I shape the wire to fit into the existing shape I had planned, without getting in the way of that shape. As before, I stick the wire into the hole and tack it in place with super glue/baking soda.
Next, I secure the end of the new wire to the original. Again, super glue/baking soda. I continue to add super glue/baking soda into the gap between the wire until it’s filled.
Push on the end of the tail just a bit. It should feel substantially more secure than before.
Now you’re ready for making tape. Pull tape off the roll in medium size sections (for a traditional scale tail, I pull it off in chunks of 4 to 6 inches.) Stick the tape across the wire, then alternate placing more piece on both sides, sticky sides in. Three to 5 layers should be sufficient. You need the tape to hold its shape, but still be easily cut with scissors.
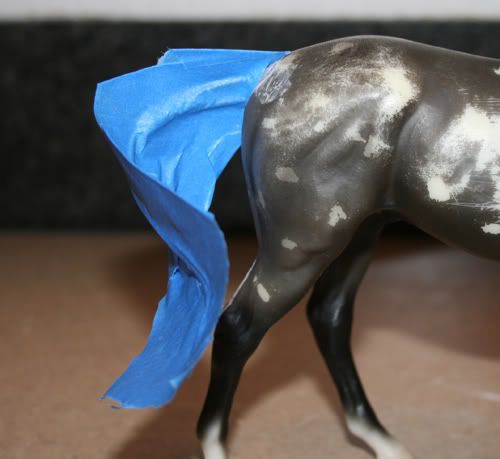
Still have your Sharpie? Next, you need to draw your designed tail shape into the masking tape.
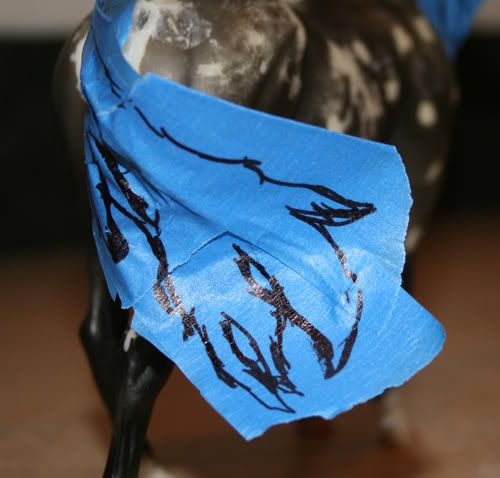
Cut out your shape.
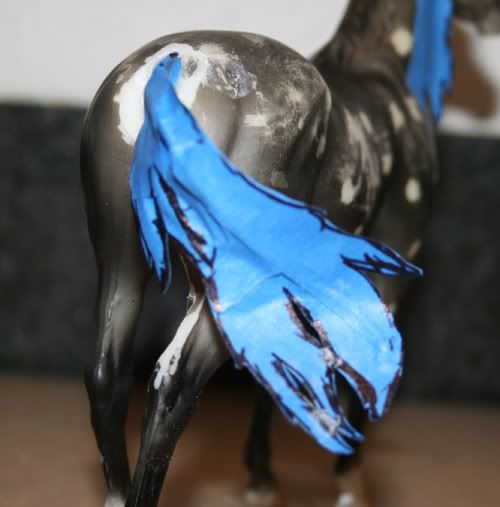
With your baking soda at the ready, you want to lightly spread a layer of super glue over your tail shape. Sprinkle with baking soda. Repeat 3 to 5 times or until your shape is rigid without being too thick.
Now comes the part where the doubt sinks in and I start to freak out. I rip off the existing tail and return to square one. This step is optional.
Measure out and mix your clay, because we’ve finally gotten around to sculpting. At long last! In the hobby, I’ve seen two basic approached to hair: 1) the Tool Approach and 2) the Noodle Approach.
The noodle approach is pretty much self-explanatory. Using wet clay, roll small noodle shapes and apply them, one at a time, to your tail to mimic the direction of hair:
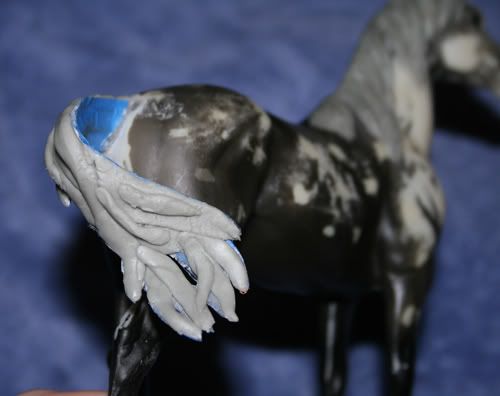
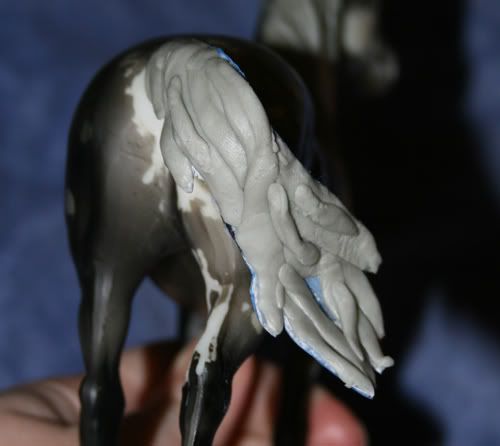
Now, with the tool approach, the sculptor will smoosh the clay on to the frame of the tail and texture with a sculpting tool. I start with the noodle approach, but finish with the tool approach. I lay out the basic hair direction with noodles, then blend and apply light detailing with my tool.
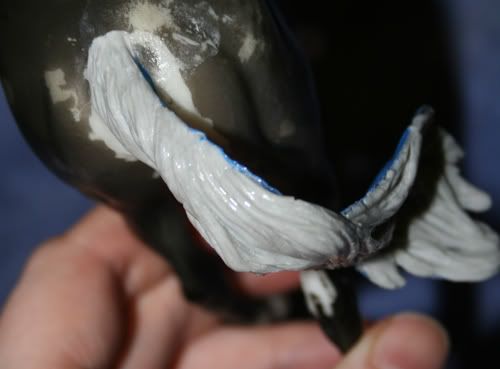
But the devil is in the details. Hair-direction isn’t as simple as drawing parallel lines. I try to create visual interest by varying hair direction.
The same way you vary direction, vary the height of the clay. The downside of the tape technique is you must fight to turn a 2-D shape into a 3-D tail. Frequently view your work from different angles so it looks as good from the top as form the side. Add more noodles and press a few deep grooves into the clay.
Then there is tool use. Everyone’s first tail invariable looks about the same because our natural tendency is to draw in the hair. A sculptor’s wedge is not a pen.
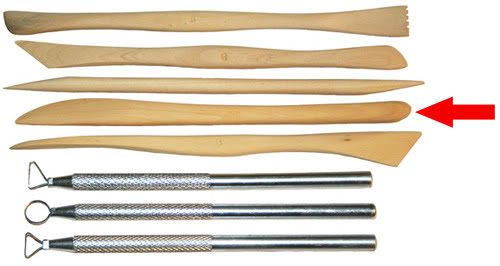
Not a pen.
Try pressing your tool more than dragging it. Try to use as much of the blade as possible, not just the tip. Roll from the back of the blade down to the tip. Alternate the angle instead keep the tool perpendicular to the clay. Experiment.
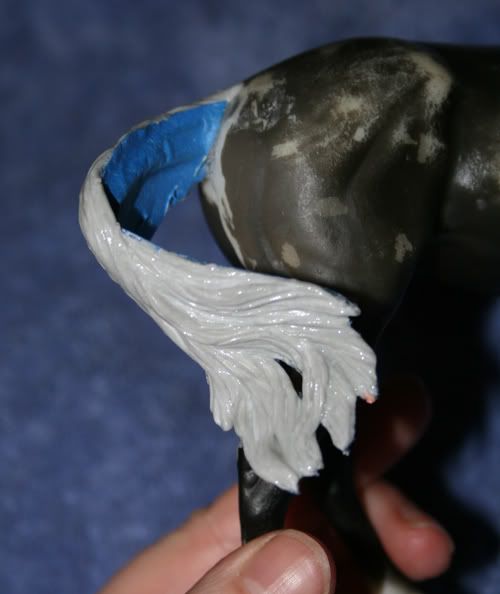
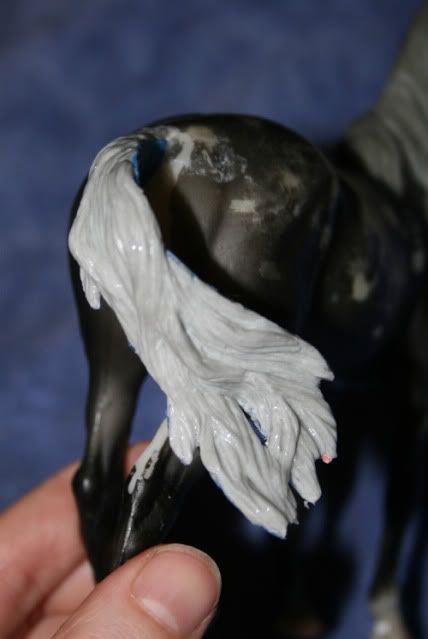
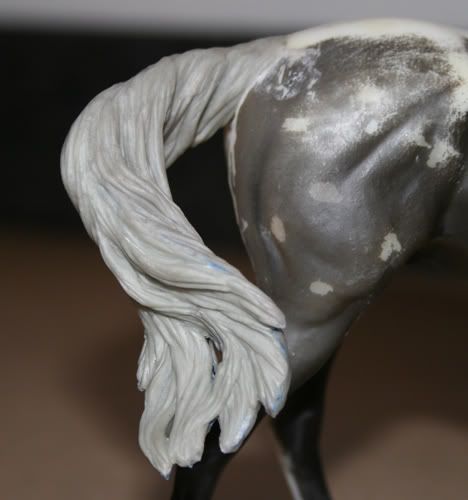
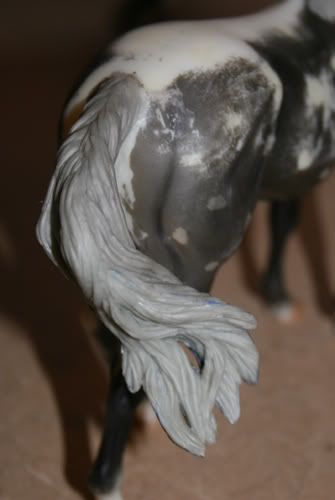
The last step to finish off the tail is smoothing. Smoothing has a huge impact on style, with some artists preferring a rougher or more detailed texture, while other want almost none. I smooth using a soft paint brush and rubbing alcohol or water. Wider brushes and rubbing alcohol will remove more texture. Smaller brushes and water will preserve more texture, while still removing the hardest edges and loose goobers on your tail. You can even go the other direction and add texture with rubbing alcohol and a stiff natural hair paint brush.
Copy, paste, repeat on the opposite side. Depending on your comfort level with wet clay (i.e. how likely are you to squish a finished area?) you can move straight to the second side or wait for the first portion to dry. After my oodles of years in the hobby, I go about 50/50. It's nice to blend the two sides together at the end, but it's not essential.


8 comments:
Thank you for these great tutorials, Laura, they're very helpful :-)
I love your Tutorials !:o)
Cant wait to see and learn more !
Thank you very much
I love them, too. They make me want to drag those bodies out and make time to work on them. Thanks!
GREAT post, as always! This will be very, very helpful for me. The double pin method looks great. Have you tried it on a small scale, like SM? Those tails are so fragile!
I haven't tried double pinning a stablemate yet, but I think its worth a shot. It's still a very new technique I still consider to be in the "experimental" stage. I came up with the idea after the tail broke on my bay Valor...again.
Strangely, I haven't had a lot of problems with breaking tails on minis. I think it's a weight thing. A traditional model can tip over and snap his own tail. I drop my minis more often than I care to admit with few breaks.
I just found your blog. I really want to thank you for the tutorials, especially the ones on how to design a tail. I have a fiery black Arabian mare who is in dire need of one, and a mane too. Thanks so much! Looking forward to the tutorials for the manes too.
Thank you so much for your Tutorials, I am new to reshaping breyers and your posts are very helpful in learning the process. You are so easy to understand. Please continue sharing your knowledge I appreciate it!
Your pictures do not show but only a message advising to update your Photo Bucket account. Even without them, your tutorials are helpful!
Thanks!
Post a Comment