Dress(age) for Success
By popular request, I’m adding a tutorial about how I sculpt the top of a dressage braid. To be honest, it’s not a topic I’ve devoted a lot of thought to in the past, but writing this has been a great chance to think about my technique, why I use it, and how I can improve.
When I’m sculpting the top of a dressage braid, I try to remember that in real life, I would be gathering a chunk of my horse’s mane to form the braid that is wider than the braid itself. For the number of braids I’ve put on this model, one braid is only a third to a quarter the width of each chunk of mane it's made from.
The other thing I try to keep in mind is how much variety you see in dressage braids. There aren’t any strict rules (that I’ve been able to find) for braiding like you would see at a hunter show. You could see a dressage horse with 7 braids or 30. That will affect the shape of the top of the braid.
The rest of today’s tutorial is brought to by the shape Triangle:
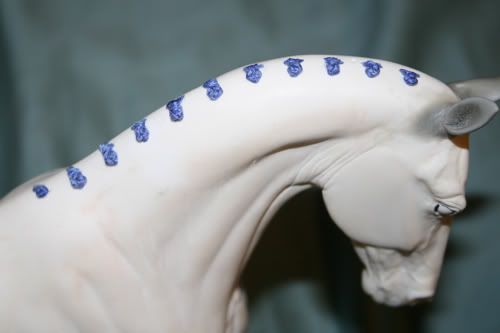
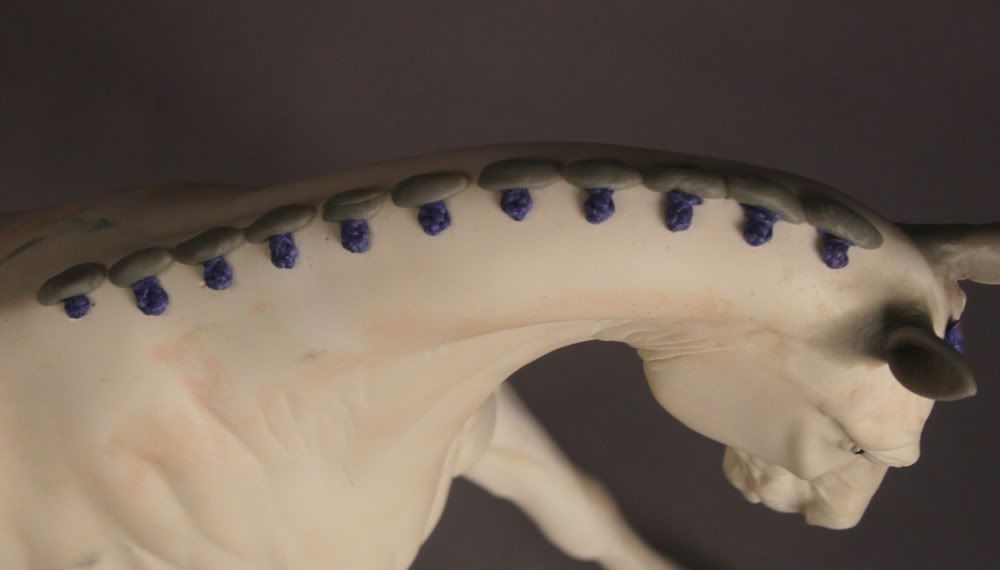
At the top of every braid, I’m trying to sculpt a triangle. If I have a lot of braids, it will be a narrow triangle. In this case, I’ve only got a few braids so the triangles will be wider and the base of the mane a bit puffier.
In this case, the braids are so far apart that I start with a short slug shape. I stick one short slug above every braid:
By popular request, I’m adding a tutorial about how I sculpt the top of a dressage braid. To be honest, it’s not a topic I’ve devoted a lot of thought to in the past, but writing this has been a great chance to think about my technique, why I use it, and how I can improve.
When I’m sculpting the top of a dressage braid, I try to remember that in real life, I would be gathering a chunk of my horse’s mane to form the braid that is wider than the braid itself. For the number of braids I’ve put on this model, one braid is only a third to a quarter the width of each chunk of mane it's made from.

The other thing I try to keep in mind is how much variety you see in dressage braids. There aren’t any strict rules (that I’ve been able to find) for braiding like you would see at a hunter show. You could see a dressage horse with 7 braids or 30. That will affect the shape of the top of the braid.

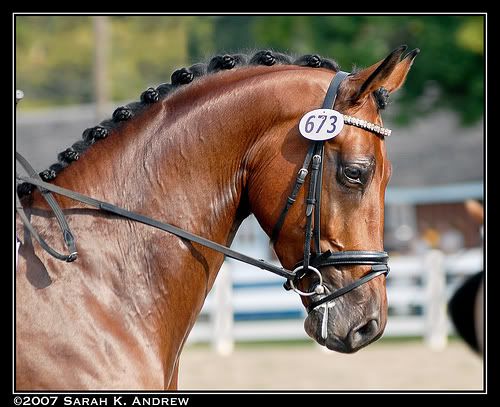
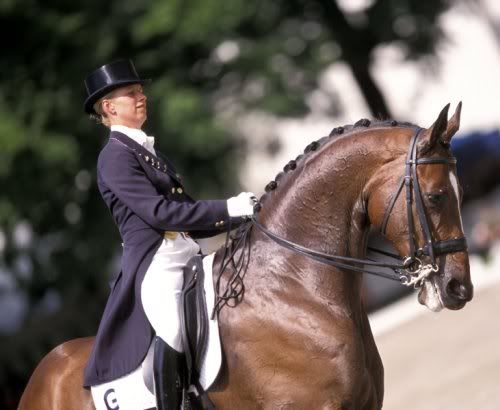
Braiding on an Grand Prix dressage horse

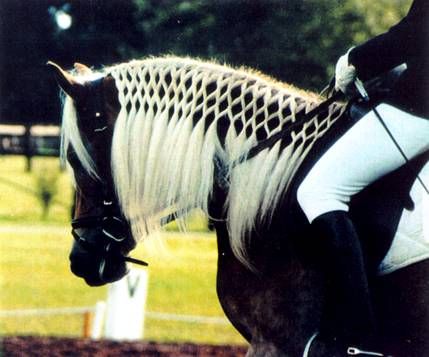
Owners of long-maned breeds must get creative. French braids are common, but you'll sometimes see alternatives as seen on the Haflinger above.
At the top of every braid, I’m trying to sculpt a triangle. If I have a lot of braids, it will be a narrow triangle. In this case, I’ve only got a few braids so the triangles will be wider and the base of the mane a bit puffier.
In this case, the braids are so far apart that I start with a short slug shape. I stick one short slug above every braid:

click to embiggen
I press the slugs with my finger onto the neck while I try to decide how flat or puffy I want the top of mane to look. As I work, they will start to look a little like road kill slugs. The ends of each slug will start to run into each and begin squish together. Don’t panic. This is what you want them to do.
I then use the tip of my handy tool…
…to shape the individual slugs into triangles. I start by using the tool like a butter knife and cutting off the excess clay on the opposite side of the mane (the non-braid side.) If I did this to every slug at once, the edges should look like a straight line all the way down the neck.
On the braid side, I use my tool to press the clay into a triangle shape and round the edges off where the mane meets the neck.

When I’m happy with the overall shape, I use my tool to press in slight lines to represent hair texture. The lines should gather together right above the braid like this:

I take a few minutes to finesse the area where the clay meets the floss braid. That means I want to get the edge of the clay to match up as closes as possible to where I tied the the braid together.

I also want to remove any clay boogers that may be hanging around the edges. Boogers are never attractive.
I finish by brushing the clay with a wet paint brush. I brush with the direction of the hair over the entire clay area, then I brush in the opposite direction just at the base of the mane on the off-side. I try to be careful not to kill the texture of the hair. My goal here is to blend the clay seamlessly to the resin of the model’s neck.

All done:

click to embiggen


3 comments:
Really cool! Looks great!
Wow, this combination of floss and Apoxie looks really good! I'll try it out, next time I need a braided mane.
On the braids and their number:
The is indeed no rule that says how many braids you have to make.
There is the unwritten rule, that an uneven number of braids will look better.
Apart from that, the number of braids and their "thickness" are used to optically correct the shape of the horse's neck.
A short neck will look longer by using many narrow/thin braids. A very long neck can be optically shortened by fewer and broader braids.
Post a Comment